Chilli Crab Spaghetti

Image

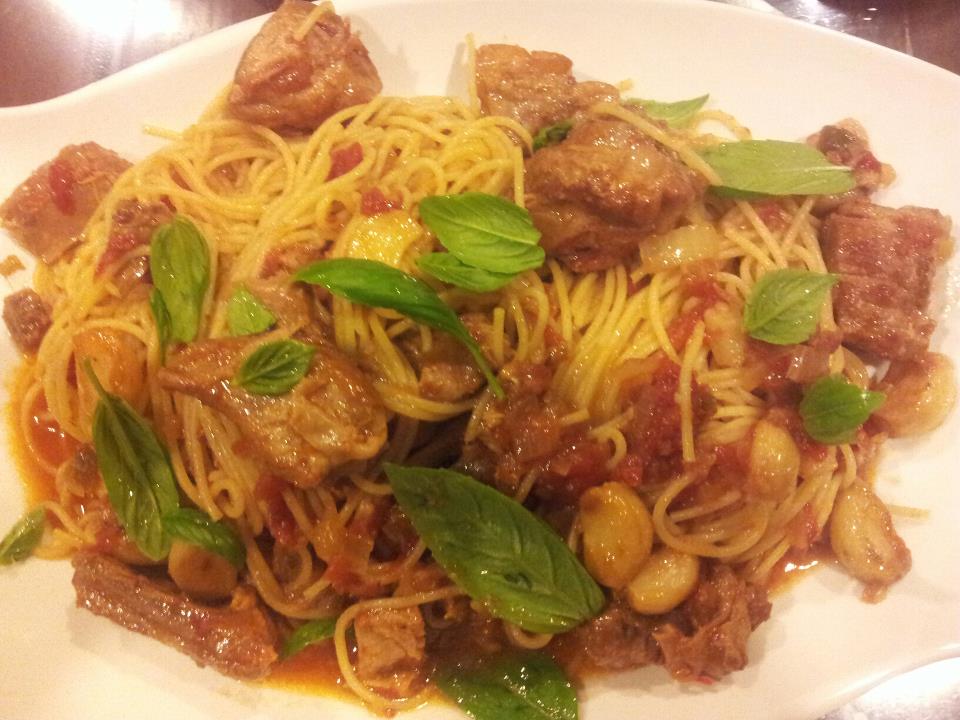
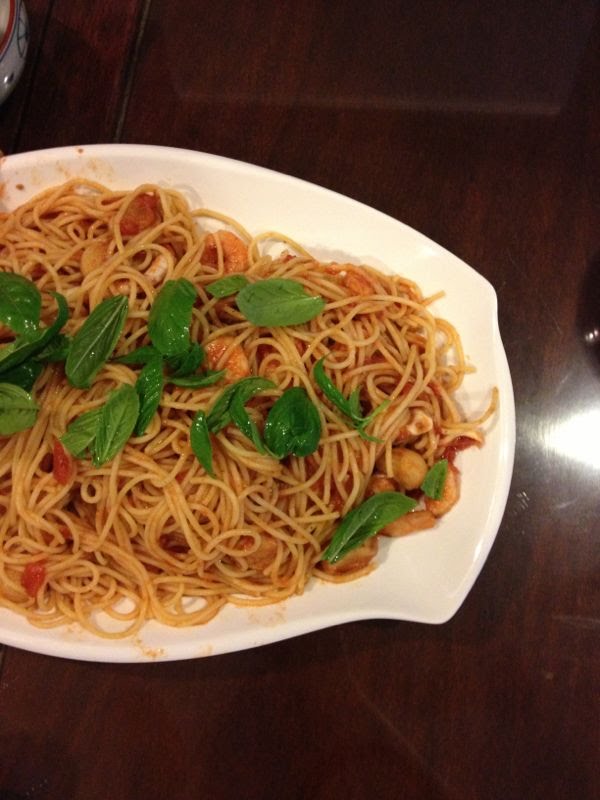
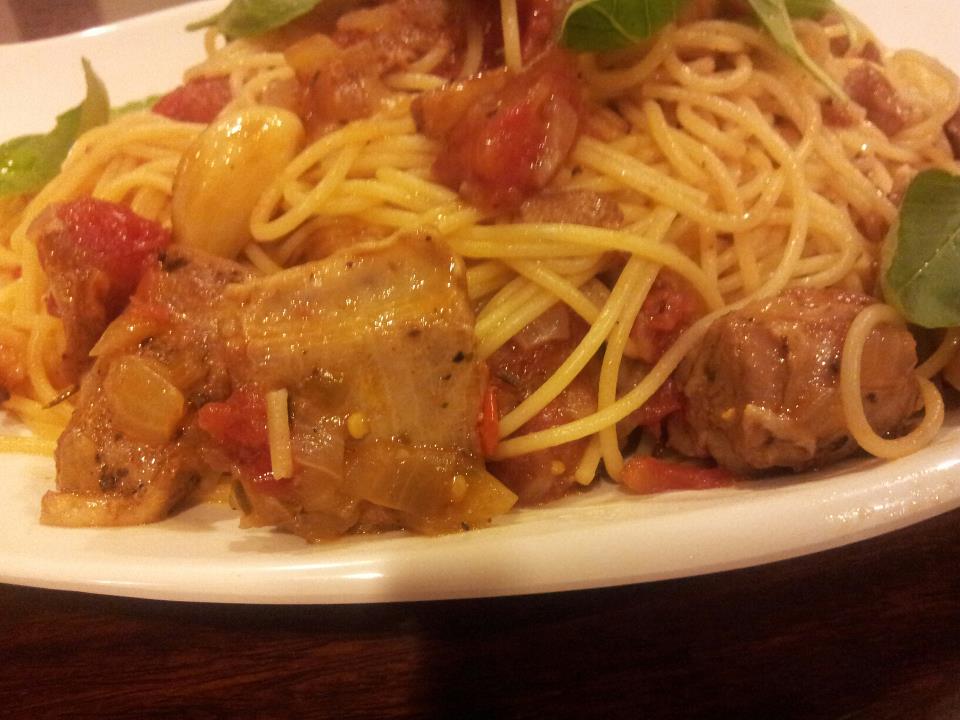
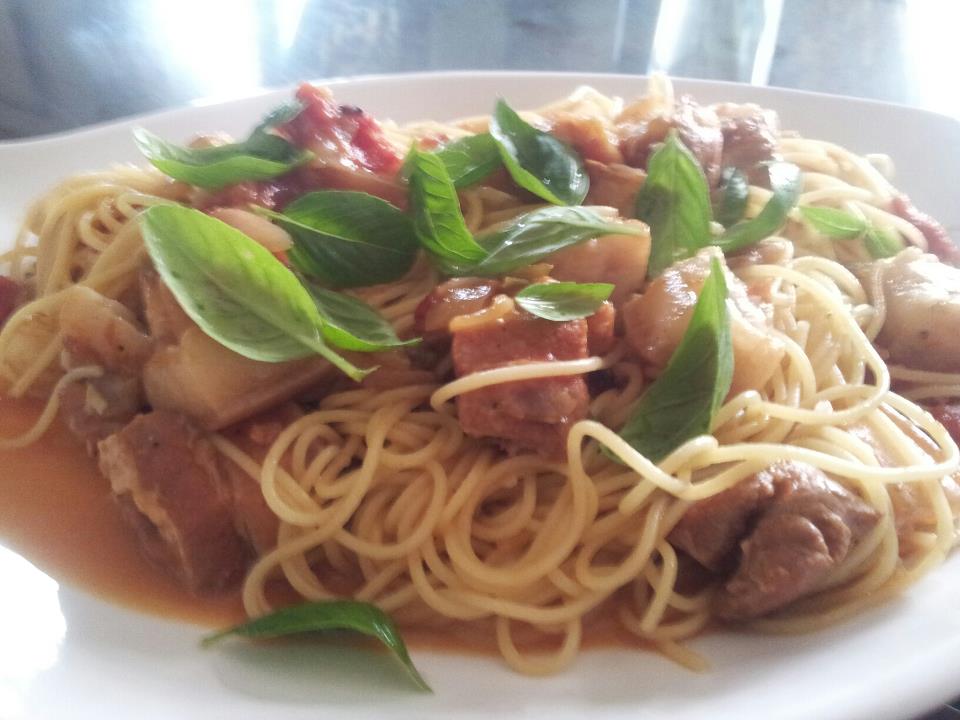
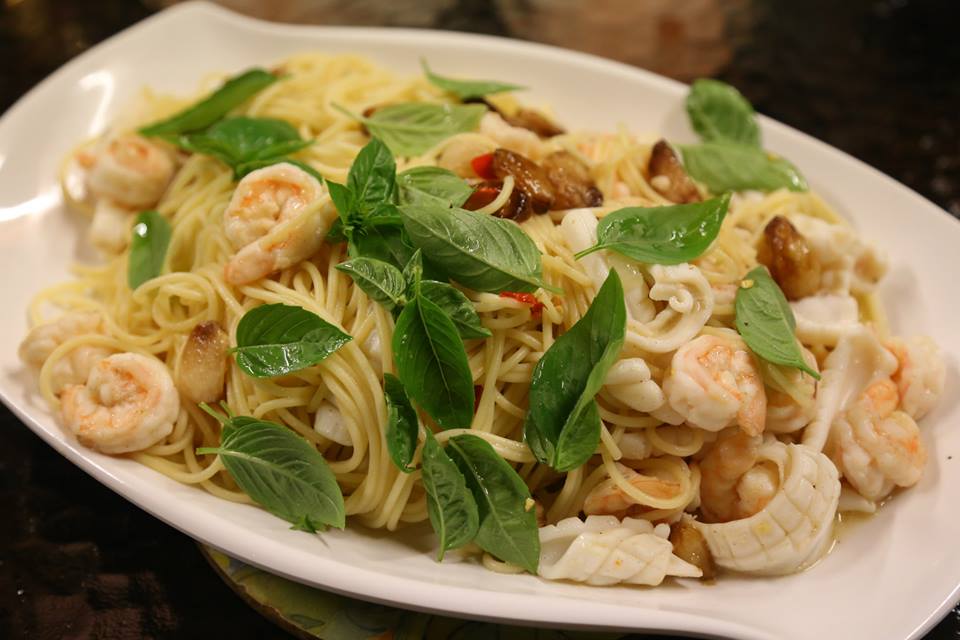
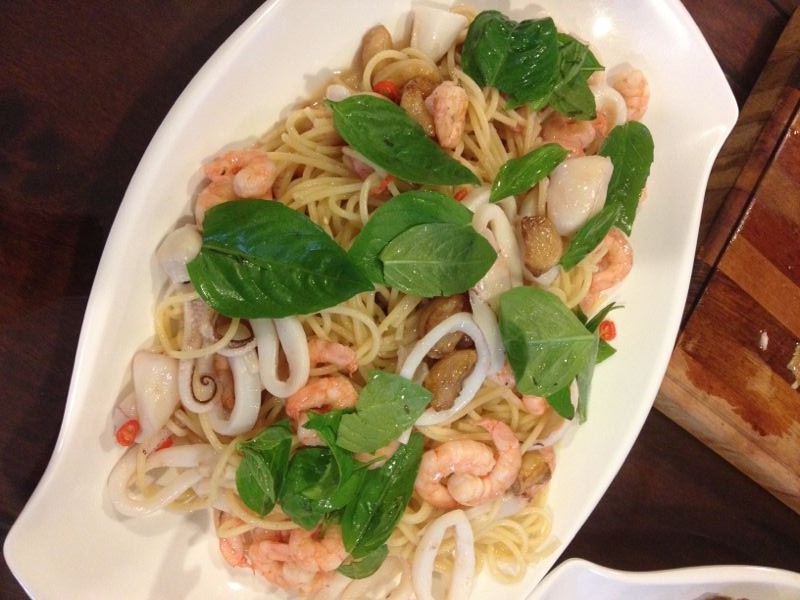
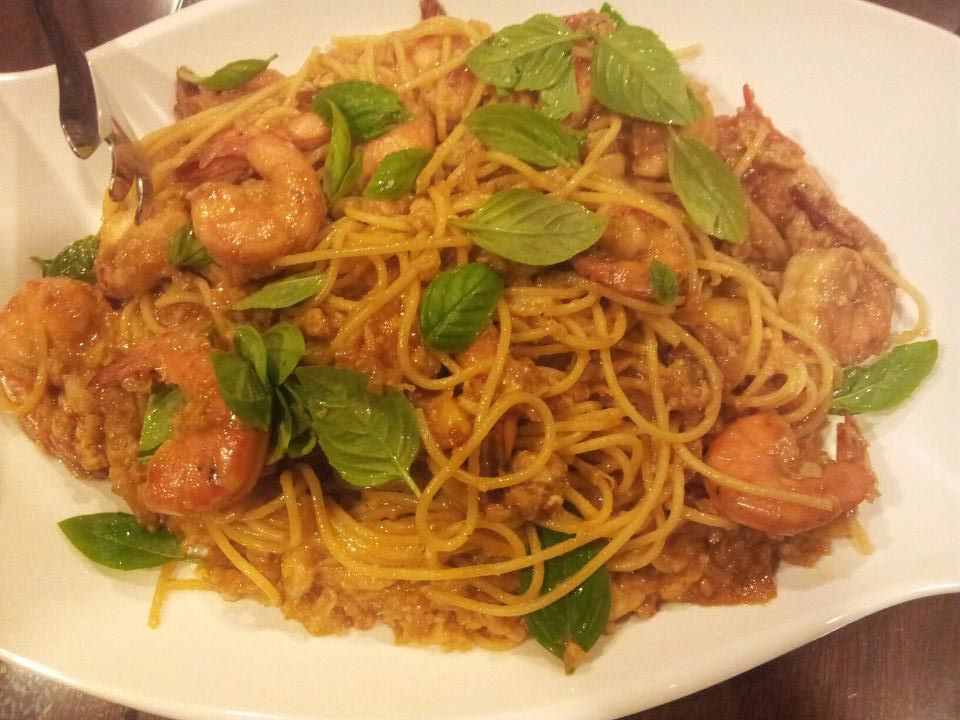
chilli crab spaghetti with prawns & crab claws

Like all good Singaporeans, chilli crab is a perennial favourite of mine, and for the past many years, chilli crab has appeared on the fusion pasta menu in some chic restaurants. One of the earliest restaurants that offer fusion pastas must be Wild Rockets, which was serving fusion pastas like laksa pesto many, many years back.

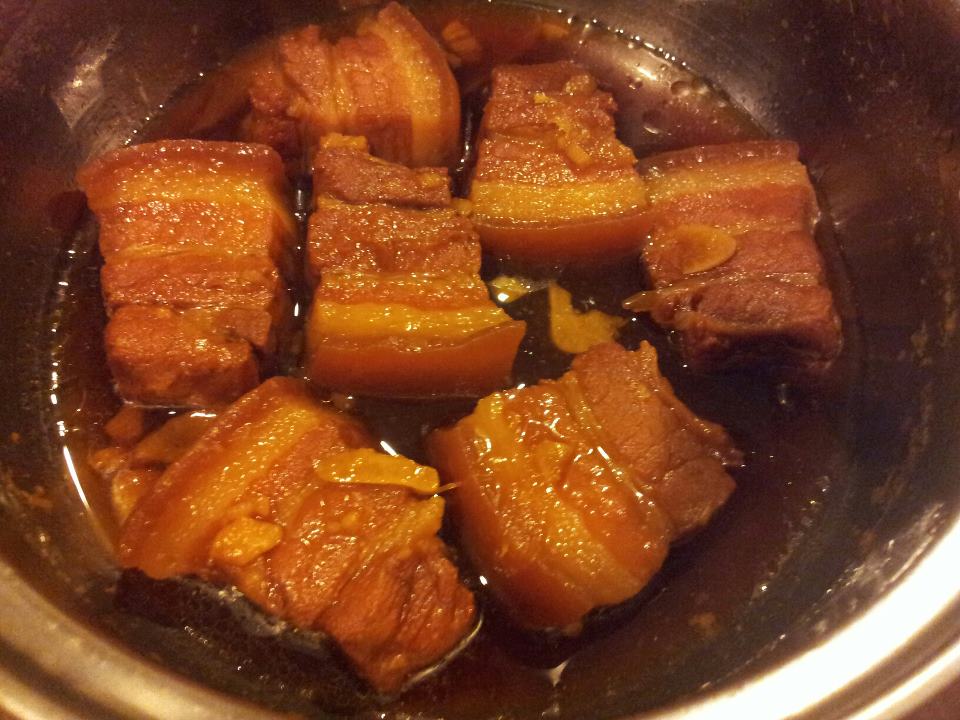
Often enough. after having a feast of chilli crabs, we save some sauce & bring home & toss it with pasta. It is not quite my favourite pasta, but I like it enough to be motivated to try. The most difficult part is the the chilli crab sauce. I googled the recipe, but I am NOT about to buy or cook crabs (something I am not convinced is worthwhile doing as good chilli crab restaurants are everywhere) just to cook a pasta. So I will have to improvise. As my family use a lot of prawns in cooking and have been throwing away the shells for the most part, I thought I can use prawn shell stock (from boiling the prawn shells & heads for 2-3hrs) as a proxy to crab.

Image

chilli crab sauce

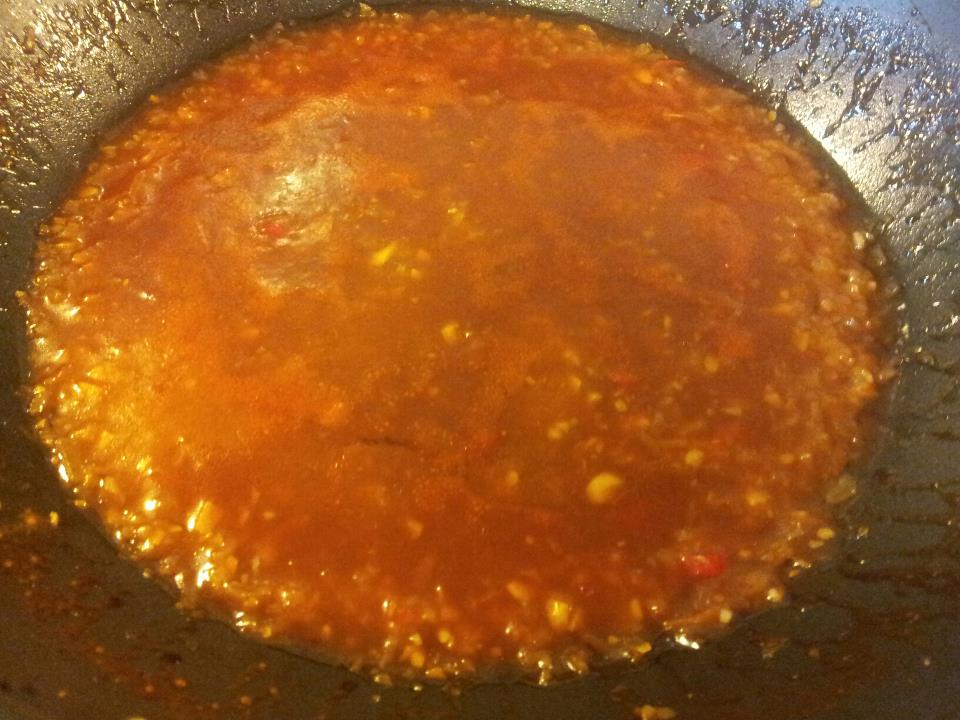
I adapted the recipe below for my purpose. The chilli crab sauce involves frying  chopped shallots, ginger, garlic & chilli padi, adding a mixture of ketchup, chilli sauce, oyster sauce, shaoxing wine, vinegar. lime juice, and then adding prawn shell stock. before serving, beat 1 egg & stir in to mix well with the chilli crab sauce. I got it right in my first attempt and am able to reproduce it without difficulty every time.

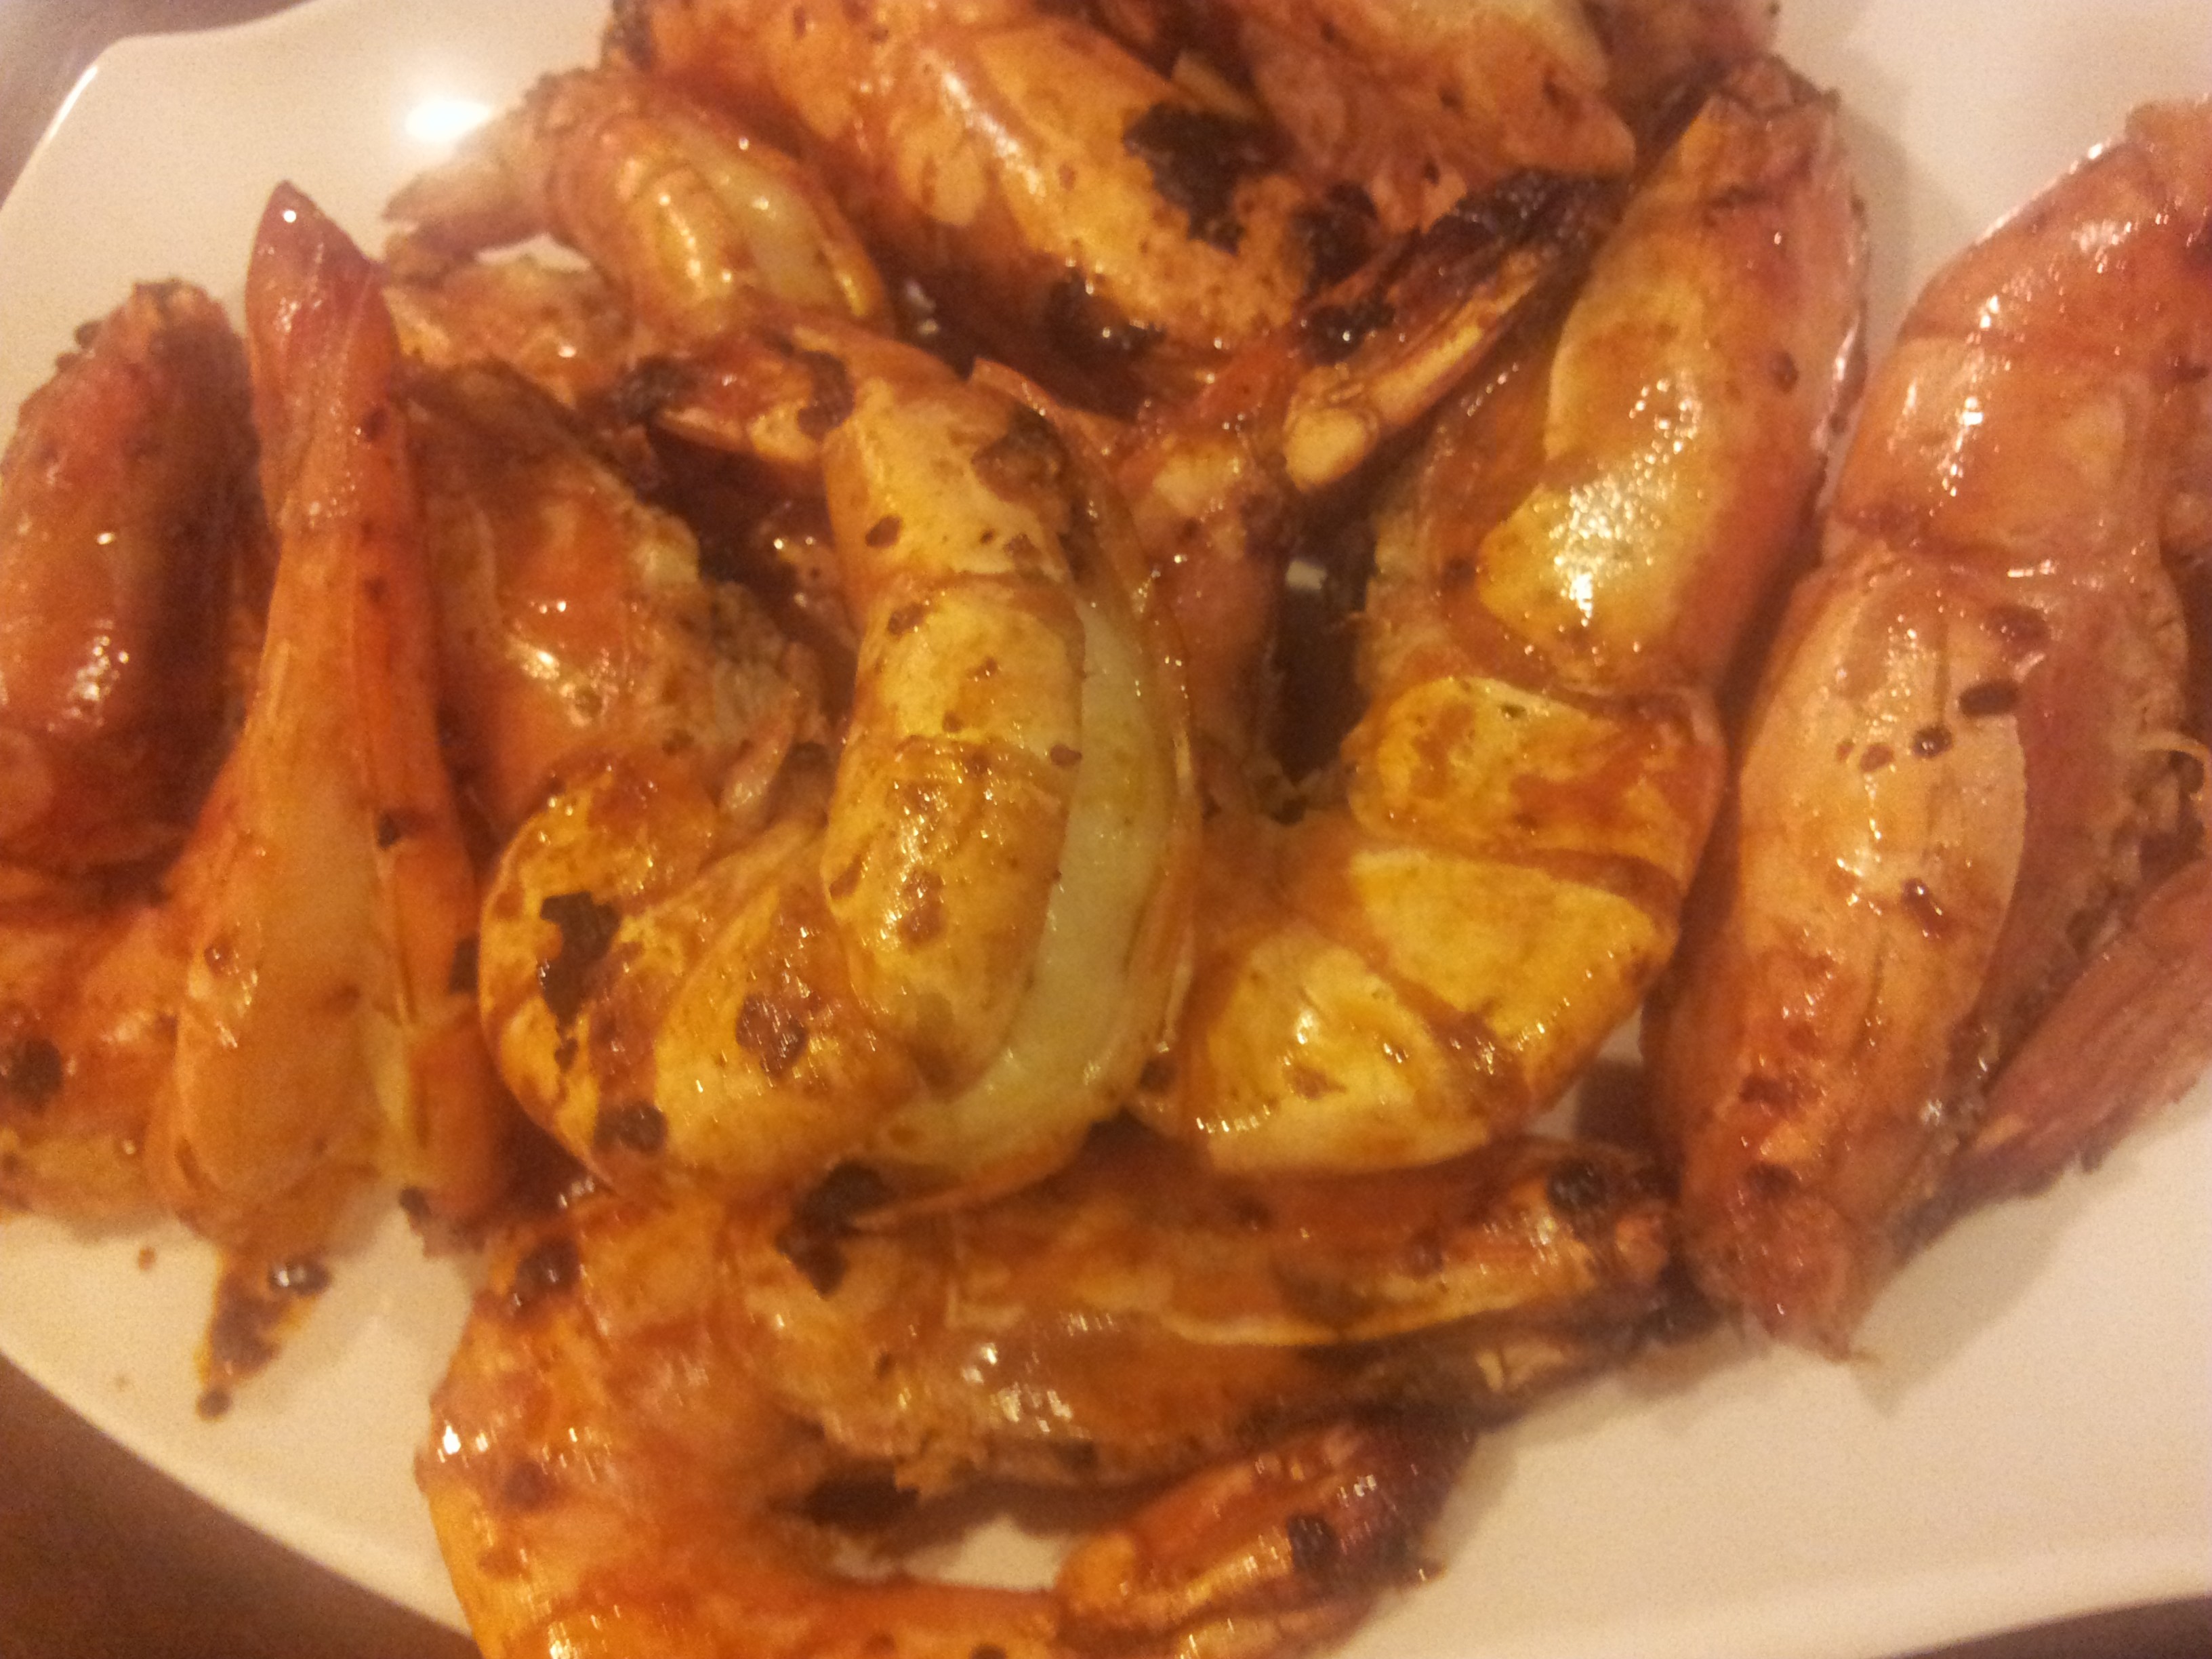
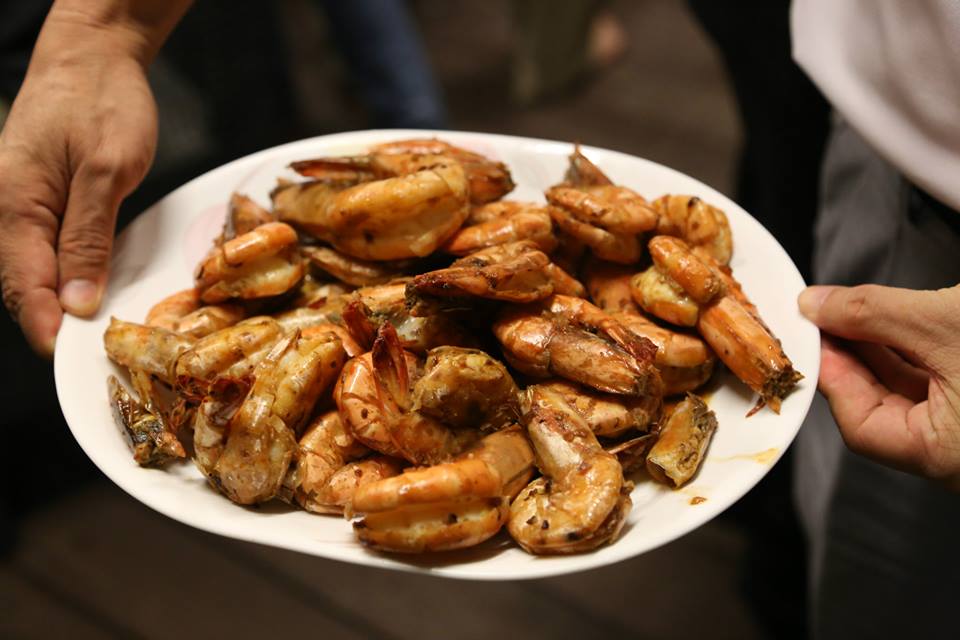
I add shelled medium prawns with tails on and frozen crab pincer meat from NTUC Fairprice or Sheng Shiong but they are not very satisfactory and can do without (good quality canned crabmeat is very expensive, like S$20 for a 400g can).

c.h.e.f andy

Ingredients:

  • 4 chopped shallots
  • 3 tsp chopped garlic
  • 1 in chopped ginger
  • 4 tbsp ketchup
  • 1 tbsp garlic chilli sauce
  • 1 chilli padi
  • 1 tbsp oyster sauce
  • 1 tbsp flat sugar
  • 1 tbsp shaoxing wine
  • 1 tsp rice vinegar
  • 1 tsplime juice
  • 2 cup prawn stock
  • 1 tbsp cornstarch
  • 1 egg
  • 1/2 cup fresh coriander

Directions:

  1. Prepare the prawn shell stock – boil prawn shells & heads in a large dutch oven for 3 hrs, strain and set aside the stock
  2. Prepare the chilli crab sauce –
    • mix the ketchup, chilli sauce, oyster sauce, shaoxing wine, vinegar. lime juice in a large bowl.
    • finely chopped the shallots, ginger, garlic and chilli padi (or pulse till finely chopped in a food processor).
    • add oil to a large wok over medium heat. and fry the chopped shallots, ginger, garlic & chilli padi for few minutes.
    • stir in the prepared mix from the large bowl, reduce heat and simmer of 3 or 4 minutes.
    • add the prawn shell stock, bring to boil, turn off the fire and set aside to use when required. before use, beat 1 egg and stir in & mix well.
  3. Prepare the spaghetti– add some salt & oil to water and boil the spaghetti according to timing instructions & drain in a colander.
  4. Cook – empty the prepared olive oil & browned garlic into a hot wok. pour the chilli crab sauce into the wok. heat briefly then turn off the fire, add in the spaghetti & toss & add sea salt to taste. Place the spaghetti in a serving dish and garnish with fresh coriander.

Pork Rib Arrabiata Spaghetti

10473_10151224549824494_99976271_n

pork rib arrabiata (spicy tomato) spaghetti

Seafood spaghetti works equally well with arrabiata (spicy tomato) sauce as with alio olio. It is kind of boring though, and personally my preference is the latter.

I tried a pork rib arrabiata at Capri with some friends last October (2012), so I thought I will give that a try. Having found a very easy youtube kakuni recipe to slow braise belly pork which I like very much, I thought I would vary it a little to braise the pork ribs.

seafood arrabiata spaghetti

seafood arrabiata spaghetti

So I follow the kakuni recipe – put the cleaned pork ribs in a pot, add 1 cup of mirin, 1 tablesppon sugar, 2 tablespoon light soy sauce, bring to boil over an induction cooker and braise for 1.5 hr at low heat (100W). I then added canned whole tomatoes which I have diced & also the tomato sauce from the can, and added diced yellow onions. I continue to braise the pork ribs for another 1/2hr by which time the pork is fork tender and falling off the bones.

pork rib arrabiata spaghetti

pork rib arrabiata spaghetti

The same way as I did for alio olio, I return the fragrant olive oil with browned garlic cloves kept aside earlier and fry with chilli padi in a hot wok, then empty the pork ribs with the spicy onions, tomatoes & sauce into the wok, heat briefly, turn off the fire, add the ready spaghetti & toss & add sea salt to taste, and garnish the dish with fresh basil from the garden before serving.

The same recipe works for belly pork (see picture below), which I prefer over the pork ribs.

belly pork arrabiatta spaghetti

belly pork arrabiata spaghetti

c.h.e.f andy

Ingredients:

  1. 250g (1/2 packet) spaghetti (serves 2-3)
  2. 4 tbsp olive oil
  3. 1 bulb garlic peeled & ready in whole cloves
  4. 500g pork ribs in 2 inch cuts
  5. 1 cup mirin
  6. 1 tbsp sugar
  7. 2 tbsp light soy sauce
  8. 1 small yellow onion diced
  9. 1 or 2 chilli padi
  10. sea salt & pepper to taste
  11. 1 cup of washed fresh basil

Directions:

  1. Braising the pork ribs – pour boiling water over the ribs & clean it in cold water. put in pot with 1 cup mirin, 2 cups water, 2 tbsp light soy sauce & 1 tbsp sugar, braise for 1.5hr. add diced canned whole tomatoes & sauce, diced yellow onions, and braise for a further 1/2hr
  2. Prepare the garlic olive oil – stir-fry whole garlic cloves on low heat to brown the garlic & flavour the oil.
  3. Prepare the spaghetti – add some salt & oil to water and boil the spaghetti according to timing instructions & drain in a colander.
  4. Cook – empty the prepared olive oil & browned garlic into a hot wok & add cut chilli padi. pour the  braised pork ribs with the spicy onion & tomatoes & sauce into the wok. heat briefly then turn off the fire, add in the spaghetti & toss & add sea salt to taste. Place the spaghetti in a serving dish and garnish with fresh basil leaves.

Seafood Alio Olio Spaghetti with White Wine

seafood alio olio spaghetti with white wine sauce

seafood alio olio spaghetti with white wine sauce

Starting off with alio olio, I have experimented with different pastas including belly pork arrabiata & chilli crab pasta. This remains firmly my favourite pasta dish though. 🙂

Image

seafood alio olio spaghetti with white wine sauce

The alio olio (garlic olive oil) is a key in this dish. I prepare this first by slowly browning peeled whole garlic cloves from 1 bulb in olive oil on low heat. You can feel the garlic olive oil aroma wafting through the kitchen. I then empty these in a bowl & while the wok is still greased with oil, I lightly fry the sotongs (squids) and small or medium shelled prawns (which have been lightly seasoned with salt & pepper) separately to 90% or just cooked & dish them into separate bowls.

seafood alio olio spaghetti with white wine sauce

seafood alio olio spaghetti with white wine sauce

I then boil the spaghetti (adding some salt & oil to the water) according to the timing instructions given on the package to just before al dente and then transfer them to a colander to drain. The spaghetti is still hot & will get cooked just a little more.

seafood alio olio spaghetti with white wine

seafood alio olio spaghetti with white wine

When I am ready to cook, I heat up the wok & emptied into it the bowl of fragrant olive oil with browned garlic cloves together with cut chilli padi and stirfry to get the aroma out, then add in the squid & prawns. I then turn up the fire & add white wine (up to 1 cup) and 1 teaspoon sugar, and reduced. I then turn off the fire, add in the spaghetti & toss & add sea salt to taste, dish them out on a serving dish & garnish with washed fresh basil from the garden.

c.h.e.f andy

Ingredients:

  1. 250g (1/2 packet) spaghetti (serves 2-3)
  2. 4 tbsp olive oil
  3. 1 bulb garlic peeled & ready in whole cloves
  4. 250g medium or small prawns
  5. 250g aka 1 large s0tong (squid)
  6. 1 or 2 chilli padi
  7. 1 cup white wine
  8. 1 tsp sugar
  9. sea salt & pepper to taste
  10. 1 cup of washed fresh basil

Directions:

  1. Prepare the prawns – shell and butterfly/de-vein the prawns. season lightly with sea salt & pepper
  2. Prepare the squid – remove the head & tentacles & wings & set aside. remove red skin from the squid body & cut into rings. season lightly with sea salt & pepper.
  3. Prepare the garlic olive oil – stir-fry whole garlic cloves on low heat to brown the garlic & flavour the oil.
  4. Prepare the spaghetti – add some salt & oil to water and boil the spaghetti according to timing instructions & drain in a colander.
  5. Cook – lightly fry the prawns & squid separately and set aside. empty the prepared olive oil & garlic into a hot wok & add cut chilli padi. add the prawns & squid. turn up the heat & add the white wine & sugar & reduce. turn off the heat, add in the spaghetti & toss & add sea salt to taste. Place the spaghetti in a serving dish and garnish with fresh basil leaves.

Tagliata di Manzo (Italian Sliced Beef) – Gordon Ramsay’s Pan Grill Method

tagliata di manzo

tagliata di manzo (added on 7.11.2014)

I rarely order steak when I dine out these days (unless it is at some famous grill restaurant or fine dining) as I can buy very good meats at a meat grocer (eg mmmm) & cook them at home easily myself! It seems like steak is the easiest thing to cook when you have a good piece of meat & I sometimes wonder how many restaurants can do it so bad – mostly because done at the wrong temperature!

There seems to be very many approaches to cooking steak. For now, I find the GR (Gordon Ramsay) method of a chargrilled steak suits me fine (Heston Blumenthal use a very different method of flipping the meat every 15 seconds! ).

tagliata di manzo (USA grain fed ribeye & australian wagyu MBS 4/5)

tagliata di manzo (USA grain fed ribeye & australian wagyu MBS 4/5)

pan-fried wagyu marbling score 6/7

pan-fried wagyu marbling score 6/7

Basically you need to have the meat at room temperature (means you take it out of the fridge for at least 1/2hr), lightly season with sea salt & coarse black pepper, grease a very hot skillet (I use the fat cut from the striploin or ribeye to grease the pan), and place the steaks on the the skillet w/o crowding, turn once, lightly touch the meat to feel for done-ness, add a small blob of butter to give it a nut brown finish, base the sauce over & let the steak soak in the flavour. You then turn off the fire & lift the steak off the pan to rest on a serving board & rest for 5minutes or longer to let the meat relax & redistribute the juices (please do see Heston Blumenthal’s very entertaining video here on the human press..lol.,to understand why). 🙂

panfried ribeye using GR (Gordon Ramsay) method

panfried ribeye using GR (Gordon Ramsay) method

The ribeye in the top picture (& in the plated tagliata di manzo below) has been aged in the fridge for 48hrs. Aging is supposed to intensify the flavour & also tenderise the steak. There is a lot of literature on this. For now I do not find significant difference whether the meat is aged for 48hrs or not, and I am happy just having the steak w/o aging. My views may change later though if I know more!

tagliata di manzo

tagliata di manzo (added on 7.11.2014)

tagliata di manzo

tagliata di manzo (added on 7.11.2014)

For the tagliata (Italian sliced beef), we just need to plate it nicely with rockets & 1/2 cherry tomatoes lightly tossed with sea salt, extra virgin olive oil & balsamic vinegar on a serving board, like so below.

c.h.e.f andy

Kakuni – Japanese Slow-Braised Belly Pork

64508_10151202840584494_605730478_n

Kakuni – Japanese braised belly pork in mirin, sugar & soy sauce

This is a very simple kakuni recipe I picked up from youtube.

It is best done with an induction heater (like any slow-cooked braising items) as you can control the heat to the absolute minimum at 100W or 200W and run less risk of boiling off the liquid & getting the dish burnt!

You want to first immerse the belly pork into a pot of boiling water (or pour boiling water over the belly pork), remove it & place in a basin or bowl of cold water and ckean thoroughly; and then cut into 1 inch blocks like in the above picture.

Place the belly pork pieces in a pot over an induction heater (or your usual stove), add in 1 cup of mirin & 2 cups of water (enough to cover the belly pork) – I also add 1 tablespoon of sugar; bring to boil & then turn to low heat for 1hr. Add 1 to 2 tablespoon of soy sauce (to taste) – the soy sauce is added later so the belly pork will retain more moisture -and braise at low heat for another 1 hr, and voila!

c.h.e.f andy

Ingredients:

  • 400g belly pork
  • 1 cup mirin
  • 1 tbsp sugar
  • 2 tbsp light soy sauce

Directions:

  1. Wash belly pork & place in boiling water. remove & place in cold water & clean thoroughly. cut belly pork into 1 inch blocks.
  2. place belly pork pieces in a pot. add 1 cup of mirin, 2 cups of water & 1 tbsp of sugar, enough to cover the belly pork completely.
  3. put the pot on an induction heater (or stove) and bring content to boil. turn to low heat and braise at low heat for 1 hr. add 2 tbsp soy sauce and braise for another 1 hr. Serve.

Garlic Jumbo Prawns

20130128_205227-e1362500772651

garlic jumbo prawns with fish sauce – dry wok, high heat

This recipe kind of self-evolved..

#10 dry wok prawns

dry wok prawns

high heat dry wok garlic prawns

high heat dry wok garlic prawns

The key is dry wok really. First, just like when pan-searing scallops. the prawns should be dry as the wok temperature drops with water & you will end up steaming or poaching the prawns. 🙂

With high heat & a very dry wok, you get barbeque flavour but though the shells maybe sightly burnt, the prawns are baked in their own shells, so the prawns are moist, succulent & sweet.

#9 dry wok king prawns

dry wok king prawns

The fish sauce is another key ingredient. There is a teochew saying brandied by my nephew when I visited Shantou that means “high furnace, hot pan & fragrant fish sauce”. Fish sauce is added only at the end to a very hot wok, aroma filling the air, before dishing the prawns out of the wok & serving.

c.h.e.f andy

Ingredients:

  • 600g large prawns (I have done up to 1.3kg=10 jumbo prawns)
  • 6 cloves of garlic minced
  • 1 or 2 chilli padi (I like the spicy kick)
  • 3 tbsp vegetable oil
  • 3 tbsp fish sauce
  • a large 28cm wok OR if doing 1 kg+ prawns then 30cm/36cm wok

Directions:

  1. Preparing the prawns – cut away the legs, whispers & spears. butterfly & de-vein the prawns. wash & put in a colander to drain & place in the fridge to dry. Take out 1/2hr before cooking so prawns will be at room temperature.
  2. Cooking – stir-fry the minced garlic and chilly padi in the wok on high heat. Add the prawns before the garlic turns black. Continue to stir & turn over the prawns for few minutes on high heat. Turn to low heat & continue to stir & turn over until the prawns start to look opaque, which means they are cooked. Do NOT cover the wok as the condensation will turn it into steaming/poaching & the barbeque flavour will be lost. When the prawns are cooked, turn heat to high and add the fish sauce. You can feel the aroma wafting. Stir to get good distribution. Dish out of the wok & serve.

Spanish Slow-cooked Beef Ribs

ImageI had this really nice lunch at La Cicala with my son Wen Yu when he was back from UK for vacation in summer 2012. They have a S$25++pax lunch set that offers choice of 2 tapas+1main course+1 dessert – really great value.  I had the Basque seafood stew as 1 tapas & the Spanish beef rib as the main, and enjoyed the lunch & companion of my son thoroughly. 🙂

I then googled and found this Spanish beef ribs recipe among others. I use Spanish chorizo that gives it a very nice flavour that for me enhances the beefy taste but also added Chinese sausage which for me added to the sweetness (some may not like this addition). The carrots, celery & yellow onions provide a very sweet vegetable broth as a counterpoint for the beefy dish, & the red peppers & tumeric (saffron is too expensive & troublesome to get for me) add to the vibrancy of the colours.

ImageI bought chuck ribs from Giant usually during sales at S$1.49 per 100g (on one occasion just S$0.99 per 100g). A 1.2kg packet with 6 ribs costs around S$20 and serves 6 – in my case as I do many course and tapas items, it can serve 8).

Spanish slow-braised beef ribs (dish was inspired by La Cicala)

Spanish slow-braised beef ribs (dish was inspired by La Cicala)

My son, though he likes my beef ribs, still prefers the La Cicala version which has beef broth instead of vegetable broth as the sauce base. I am happy with this vegetable broth version to balance the strong beefiness.

Spanish slow-braised beef ribs (dish was inspired by La Cicala)

Spanish slow-braised beef ribs (dish was inspired by La Cicala)

Spanish slow-braised beef ribs (dish was inspired by La Cicala)

Spanish slow-braised beef ribs (dish was inspired by La Cicala)

ImageI had this for the 6.10.2012 dinner which by design coincided with Jeanette’s birthday celebration & the photo above was taken by Jeanette who loved the dish. I did this again for the “Best Of” dinner and all my friends (even Cheng Poon who generally avoided beef) loved it!

c.h.e.f andy

Ingredients:

  • 1.2kg chuck ribs
  • 1 onion, diced
  • 1 carrot, peeled & diced
  • 1 celery, diced
  • 2 cloves garlic, minced
  • 1 Spaish chorizo + 1 Chinese sausage, cut into 1 cm pieces
  • 1 red pepper, cut into 2cm pieces
  • 3 tbsp olive oil
  • 1 tbsp flour
  • 1 cup white wine
  • 3 cups chicken stock
  • sea salt & coarse black pepper to taste

Directions:

  1. Season chuck ribs with sea salt & coarse black pepper.
  2. Place in a baking tray & put in the oven preheated to 210degC (I use the grill function) 12 minutes on each side to brown.
  3. fry onion, carrot & celery in olive oil over high heat in a large wok until the vegetables softened.
  4. Add minced garlic & Spanish chorizo & Chinese sausage and cooked until they are nicely browned, around 5 minutes. Add the red peppers & flour and cooked for a few minutes.
  5. Add the white wine & reduced the liquid by 1/2. Add the chuck ribs. Turn to low heat and braised the ribs for 2hrs until the ribs are tender & falling off the bones. Season with sea salt to taste, portion the ribs & serve.

Chocolate Lava Cake

Chocolate Lava Cake with Strawberries

as it turned out, i subsequently made very good tofu cheese cake, tiramisu, banoffee cake & pumpkin cheese cake, so i have not made the lava cake for a while. i also tried a jam crumb cake which was pretty ok too.

I am generally NOT a dessert person. When dining out with family or friends, I will take the lower cost 2-course option (for set meals) & pick an appetizer & main, ostensibly also to avoid too much calories.

I also have NOT baked in my entire life before this, and in any case I only started any form of serious exploring of cooking from Mar2012 when I had my first 5-course home cooked dinner for friends.

It was in August 2012 after a very nice smoked meat dinner at a friend’s place, where some friends brought along a very nice tiramisu cake, that I started then to google for some dessert I can make. Well I found one which I now do rather well – the oozing chocolate lava cake. But I must say that I am both NOT motivated and luckless in finding another “worthwhile” dessert to make (worthwhile being that there is a “wow” factor in producing it & it is nearly as good or better than what you can grab from a good bakery stall). I can make a passable apple pie now but does not quite meet my “worthwhile” criteria. I had been looking at soufle recipes for a while and hopefully that would be the subject of my post in the not too distant future.

Back to the oozing chocolate lava cake. I was successful in my 3rd attempt, and thanks to Facebook for being such a faithful repository of memories, that was on 22.8.2012!

success at 3rd try!chocolate lava cake oozing lava @ home 0n 22.8.2012

success at 3rd try!
chocolate lava cake oozing lava @ home 0n 22.8.2012

Well, now I can make an awesome chocolate lava cake 99% of the time successful. It is NOT really as good as some very good ones in restaurants here but still equal or better than many.

The keys to a good chocolate lava cake are (1) taste & (2) lava; otherwise it will be just a good tasting brownie! I find the 70% cocoa chocolate makes the lava cake flavour really mesmerising. I have tried Cadbury Old Gold Dark Chocolate but w/o the cocoa the taste experience is several notch down, so if you do you will need to experiment with adding cocoa to get to the right taste. For the lava, the size of the muffin tray (I still do not have ramekins!),  temperature & timing are CRITICAL; and because in this recipe the time is only 3mins 30secs, any variation & you will have to trial & error to get the correct combination. For example, I have to use the grill function at 210degC in order that the top hardens while inside is still molten & let the bottom harden further while resting for few minutes!

c.h.e.f andy

Ingredients:

  • Cadbury Old Gold chocolate 70% cocoa 100g (1/2 bar)
  • unsalted butter 100g (0.4x250g bar)
  • sugar 1 tbsp flat
  • normal flour a tbsp flat & sifted
  • 3 eggs + 2 eggyolk
Directions:
  1. beat egg & sugar
  2. add in flour & beat (steps 1 & 2 can do together)
  3. melt butter & chocolate (on top) in microwave 70-80seconds & beat
  4. then add slowly to egg mixture (so egg won’t be cooked as chocolate slightly warm) & beat
  5. use butter cube to grease thoroughly each cup of 6 cup small muffin tray & fill up 70% with the chocolate mix
  6. preheat oven to 210degC and put to grill/broil function
  7. place muffin tray in preheated oven – use phone to time 3mins 15secs & remove immediately
  8. leave muffin tray for few minutes for bottom (top when inverted) to harden
  9. invert & serve the chocolate lava cake with a nice ice-cream or strawberries

Skin-on Pan-roasted Brined Chicken Breast

skin-on pan-roasted brined chicken breast

skin-on pan-roasted brined chicken breast

I first heard about brining from a friend wei (must give credit where credit is due..haha!) some 7 months back when she invited a few of us for a homecooked lunch of (you guessed it!) roasted brined spatchcock, GR (Gordon Ramsay) crackling belly pork, roasted pumpkin/tomatoes/onions & focaccia etc.

At the time I was doing a rather nice but boring oven roast chicken the usual way of rubbing with a marinate of seasalt, pepper, herbs (rosemary, basil, parsley flakes etc) and pushing whole cloves of garlic under the skin & putting it to the oven. So I was reading about brining for interest but has yet to find much use for it.

see here for a good read about brining.

Then I came across a super video recipe for this skin-on pan-roasted brined chicken breast & tried it on New Year Eve 31.12.2012 & it worked beautifully. I have since done it a few times & it unfailingly produces the best moist, tender, tasty chicken breast. I cooked it for the CNY (Chinese New Year) 3rd Day gathering of 14 hungry 19-year olds for Su Lin, my youngest daughter & the youngsters all loved the chicken; and I might add also the belly pork, pasta & angus beef steak!

I have gone on and tried the recipe on chicken drumstick (I have to agree with Su Lin that I actually like the drumstick even better) and also varied the recipe on duck breast & drumstick – here both are very good but the brined duck breast is just, just SENSATIONAL!

pan-roasted brined chicken drumstick

pan-roasted brined chicken drumstick

and here is the video recipe.

c.h.e.f andy

Ingredients:

  • 2xchicken breasts with wingstick (I use a 1.4kg chicken from Sheng Shiong or Giant hypermarket)
  • 1 litre water
  • 5% salt (about 50g)
  • 3% sugar (about 30g)
  • 5 limes (or about 30ml bottled lime juice)

Directions:

  1. Preparing the chicken breasts with wingstick – use kitchen scissors to cut chicken in 1/2, then cut around the drumstick into 1/4 (breast with wingstick & drumstick quarters),  then cut away & remove the bones under the breast completely, then cut away the fat, wash & clean
  2. Brining – add 1 litre water in a large plastic container, mix in about 3 heap tablespoon salt & 2 heap tablespoon sugar & stir to dissolve, then pour in 30ml bottled lime juice or squeeze juice from about 5 limes. Put 2x cleaned chicken breasts with wingstick into the container and place container in fridge for 24hours. Remove & wash chicken breasts thoroughly in slow running water & place on a rack to airdry in fridge for 24hrs (can also skip this step & dry with kitchen towels)
  3. Cooking – Remove chicken breasts from fridge & leave it at room temperature for at least 1/2hr. Heat oven-proof non-stick pan on high heat, add olive oil to grease pan & turn to medium heat. Place the chicken breasts 1 at a time skin-down in hot pan & fry for 4minutes to get crispy skin. The oil will sputter a bit, turn to low heat after 1 minute. Preheat oven to 250degC. Place oven-proof pan in oven & let the chicken cook for 10minutes. Remove pan from oven & remove chicken breasts from pan immediately & let them rest for 10 minutes, Serve.

I am NO chef!

SORRY GUYS!

chefandy is NOT a chef’s blog! I am NO chef!

The only reference to “chef” you will find in this blog will be to the great chefs who I pick & learn my internet & video recipes from.

c.h.e.f stands for cook.hangout.eat.fun

I cook, somewhat belatedly in life I must add but in time to discover that I am really liking it (hohoho! so I am now an ardous advocate of better late than never!), and maybe because I have nothing better to do (haha! just being self-deprecating – learning to laugh at myself – a good habit that does no harm to ego or prestige).

The journey probably started on 12.3.2012, when I invited 10 friends for homecooked dinner. Looking back at the photos of the 5 dishes I did then, I am truly a lucky bloke to have all these indulgent & risk taker friends – if it were me, I probably won’t care much to be invited again. haha! anyway, that will be story & photos enough for another post.

see also why i blog & my guidelines & perspectives.

c.h.e.f andy